

Blog
Ghost Directed Drawing Worksheets for Kids – Step-by-Step Halloween Drawing

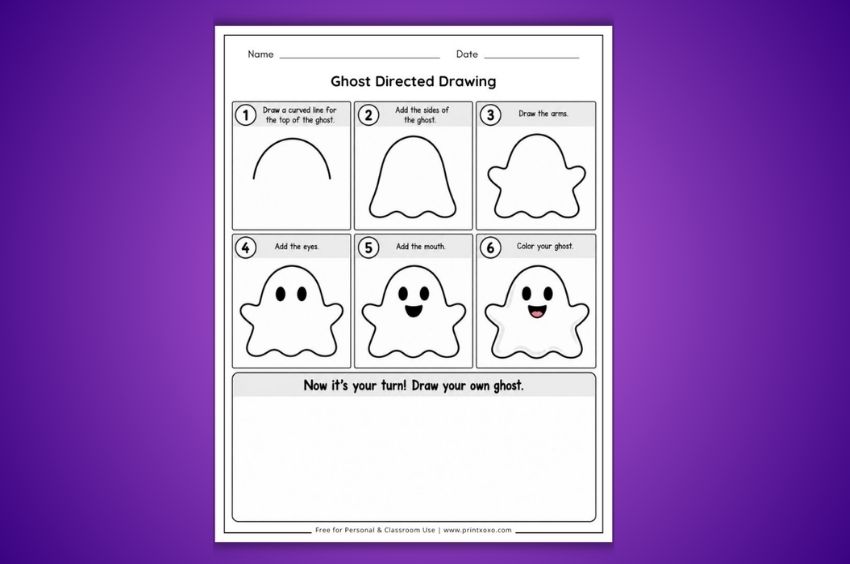
Halloween is a great time for kids to try simple drawing activities. This Ghost Directed Drawing worksheet gives preschool and kindergarten children clear steps to follow as they draw a friendly ghost, then leaves space for them to create their own.
Ghost Directed Drawing Worksheet
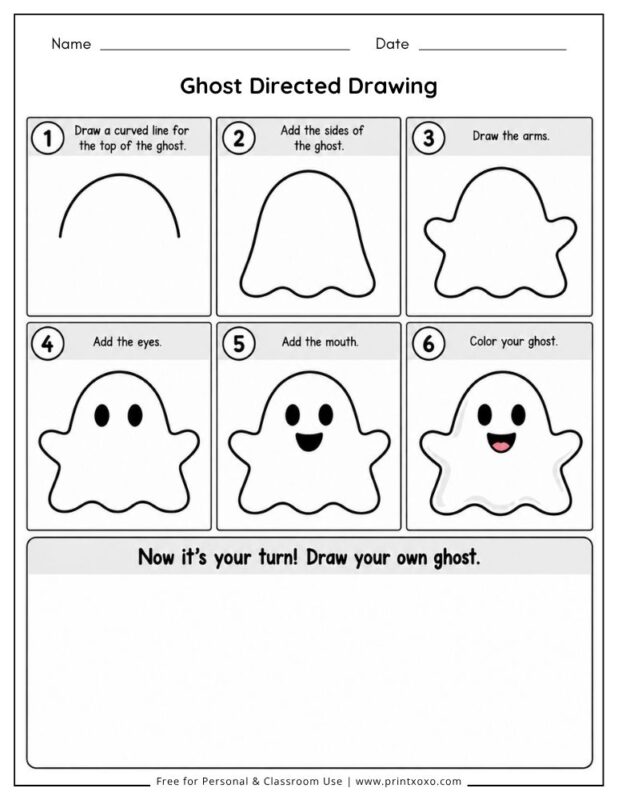
Follow each step to draw the ghost, then use the large practice area to make your own ghost.
A4 Size PDF: 210 × 297 mm
US Letter PDF: 8.5 × 11 in
How the Ghost Drawing Worksheet Works
The worksheet breaks the ghost into six simple drawing steps.
Children start with the curved top of the ghost and gradually build the shape by adding the sides, arms, eyes, and mouth. The last step shows a finished ghost with a small color example.
This gives children a clear starting point instead of asking them to draw the whole ghost at once.
After the six steps, there is a large blank practice area where children can draw their own ghost.
Step 1: Start With the Top of the Ghost
The first step uses a simple curved line to create the top of the ghost’s head.
It is a basic shape that children can copy before moving on to the more detailed parts.
Starting with one simple line can make the drawing feel less difficult for young children.
Step 2: Add the Ghost’s Sides
Next, children extend the curved shape down to form the main body of the ghost.
The bottom has gentle curves that give the ghost a floating, friendly look.
At this stage, children can focus on following the shape rather than worrying about adding details.
Step 3: Draw the Arms
The third step adds the ghost’s arms.
The arms are part of the outline, so children can see how a few curved lines can change the basic shape into a recognizable ghost.
Step 4: Add the Eyes
Once the main ghost shape is finished, children add two simple eyes.
This is where the drawing starts to look more like a character.
Step 5: Add the Mouth
The next step adds the smiling mouth.
With the eyes and mouth in place, the friendly ghost is almost complete.
Step 6: Color the Ghost
The final step shows the finished ghost with a small color example.
Children can look at the example for an idea of how they might color their own drawing. They can also choose completely different colors if they want to make their ghost unique.
Now It’s Your Turn
The worksheet includes a large blank space underneath the guided steps.
This part is important because children are not only copying a picture. After following the instructions, they get a chance to draw their own ghost.
They can make the ghost look similar to the example or change the face, shape, and details.
For younger children, simply drawing the same basic ghost again is perfectly fine. Older preschoolers and kindergarteners may enjoy adding their own Halloween details.
Why Directed Drawing Works Well for Young Kids
A blank sheet of paper can sometimes be difficult for a young child. They may know what they want to draw but not know how to begin.
Directed drawing gives them a starting point.
Instead of thinking about the entire picture, children can focus on one step at a time. This also gives them a chance to practice looking closely at shapes and copying simple lines.
The activity is creative, but it also involves paying attention and following a sequence of instructions.
A Simple Halloween Art Activity
Ghosts are an easy Halloween theme for young children because the basic shape can be made with simple curves and a few facial details.
This makes the worksheet useful when you want a Halloween activity that is more than just coloring.
You can use it as a short drawing activity before a Halloween story, during an art center, or as a quiet activity after other classroom work.
At home, it can be used as a simple screen-free activity during October.
Using the Ghost Worksheet at Home
Parents can print the worksheet and let children work through the steps at their own pace.
You can sit beside your child and draw along with them, or let them try the steps independently if they are comfortable following the pictures.
After the guided drawing is finished, give them crayons or colored pencils and let them decorate their own ghost.
There is no need to correct every line. Young children will naturally make drawings that look a little different from the example.
The main goal is to follow the steps, practice drawing, and enjoy the activity.
Using It in Preschool and Kindergarten
Teachers can use this worksheet as a Halloween art activity during October.
It can fit into an art center, a small-group activity, or a short whole-class drawing session.
For a group activity, you can introduce one step at a time. Children can complete that step before moving on to the next one.
The large practice section also gives children an opportunity to work independently after the guided portion is finished.
Make Each Ghost Different
Once children understand the basic drawing, encourage them to make their own version.
They could:
- Change the ghost’s facial expression.
- Give the ghost a different shape.
- Add a hat or bow.
- Draw a Halloween background.
- Add a moon, stars, or other simple details.
- Use their favorite colors.
This turns one guided drawing into an open-ended art activity without making the original worksheet more complicated.
A Good Activity for Following Directions
Directed drawing also gives children practice with sequencing.
They need to look at the first step, complete it, and then move to the next one. The order matters because each new step builds on the drawing that came before it.
For young children, this is a simple way to practice following visual directions while doing something creative.
Printing the Ghost Directed Drawing Worksheet
The worksheet is available in A4 size and US Letter size, so you can choose the version that fits your printer and paper.
For everyday practice, regular printer paper works well. If children will be using markers, crayons, or adding extra artwork around the ghost, cardstock or slightly heavier paper can also be used.
Print the worksheet in black and white for a simple, printer-friendly activity. The small color example on the final step can be used as a reference while children choose their own colors.
Frequently Asked Questions
What is a Ghost Directed Drawing worksheet?
A Ghost Directed Drawing worksheet shows children how to draw a ghost through a series of visual steps. Each step adds another part until the finished ghost is complete.
What age is this ghost drawing worksheet for?
This worksheet is designed for preschool and kindergarten children. Younger children may benefit from an adult guiding them through each step.
Is the ghost drawing scary?
No. The worksheet uses a simple, friendly ghost design that works well for young children and Halloween activities.
Can children color the ghost?
Yes. The final step includes a small color example, and children can use it for inspiration before coloring their own ghost.
Can children draw their own ghost?
Yes. A large blank practice area is included at the bottom of the worksheet so children can draw their own ghost after completing the guided steps.
Can I print the worksheet on US Letter paper?
Yes. A US Letter 8.5 × 11 inch version is available along with the A4 version.
Final Thoughts
This Ghost Directed Drawing worksheet gives young children a simple way to practice drawing during Halloween. The six visual steps make the process easy to follow, while the large practice area gives children room to create something of their own.
It works as a quick Halloween art activity at home, in preschool, or in kindergarten. Children can follow the example first and then put their own ideas into the final drawing.
The best part is that every finished ghost does not have to look exactly the same. Once children understand the basic steps, they can make the character their own.